Home
Self-install
Self-install
Follow the instructions below to connect
your services quickly and easily.
Getting Started
Internet connections
Internet modem installation

Step 1 of 11
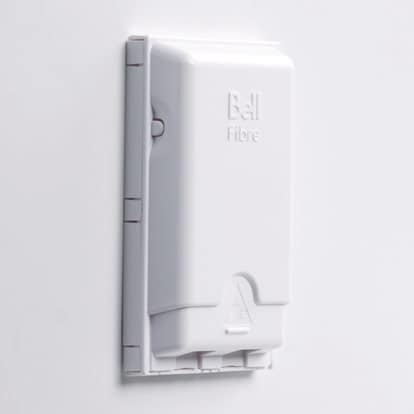
Locate the fibre jack already installed in your home.
Step 2 of 11
Remove the green connector from the end of the white cable attached to your modem.
Step 3 of 11
Plug the green end of the white cable into the wall jack. Ensure the correct orientation.
Step 4 of 11
Connect the power supply to the modem.
Step 5 of 11
Connect the power supply to a power outlet.
Step 6 of 11
Please wait while your modem activates and reboots. This could take up to 15 minutes. You will see three solid white lights when it’s done.
Step 7 of 11
Connect to Wi-Fi with the network name and password located on the back of your modem.
Step 8 of 11
Download the Bell Wi-Fi app to easily manage your home network.
Step 9 of 11
If you ordered Wi-Fi pods, follow the instructions in the Bell Wi-Fi app to get set up. Visit bell.ca/wifi to learn more.
Step 10 of 11
If you have Home phone, connect your phone cord to the green port labelled Tel1 on the back of your modem.
Step 11 of 11
You’re all set.

Step 1 of 13
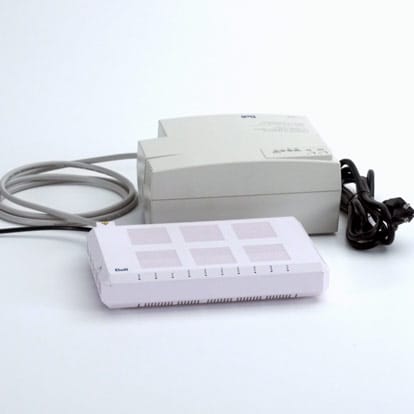
Locate the Optical Network Terminal and its power supply already installed in your home.
Step 2 of 13
Disconnect the Optical Network Terminal power supply from the power outlet.
Step 3 of 13
Loosen the screw underneath the yellow triangular sticker on the back of the Optical Network Terminal.
Step 4 of 13
Remove the cable by pulling the green end from the Optical Network Terminal.
Step 5 of 13
Insert the green end into the connector attached to the cable coming from your new modem.
Step 6 of 13
Connect the power supply to the modem.
Step 7 of 13
Connect the power supply to a power outlet.
Step 8 of 13
Wait until the three lights on the right of the modem are solid. Note: your modem will reboot during the process. This could take up to 15 minutes.
Step 9 of 13
Connect to Wi-Fi with the network name and password located on the back of your modem.
Step 10 of 13
Download the Bell Wi-Fi app to easily manage your home network.
Step 11 of 13
If you ordered Wi-Fi pods, follow the instructions in the Bell Wi-Fi app to get set up. Visit bell.ca/wifi to learn more.
Step 12 of 13
If you have Home phone, connect your phone cord to the green port labelled Tel1 on the back of your modem.
Step 13 of 13
You’re all set to go.
Step 1 of 10
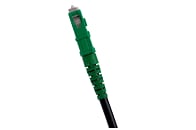
Locate a cable with a green end in your home.
Step 2 of 10
Insert the green end into the connector attached to the cable coming from your new modem.
Step 3 of 10
Connect the power supply to the modem.
Step 4 of 10
Connect the power supply to a power outlet.
Step 5 of 10
Wait until the three lights on the right of the modem are solid. Note: your modem will reboot during the process. This could take up to 15 minutes.
Step 6 of 10
Connect to Wi-Fi with the network name and password located on the back of your modem.
Step 7 of 10
Download the Bell Wi-Fi app to easily manage your home network.
Step 8 of 10
If you ordered Wi-Fi pods, follow the instructions in the Bell Wi-Fi app to get set up. Visit bell.ca/wifi to learn more.
Step 9 of 10
If you have Home phone, connect your phone cord to the green port labelled Tel1 on the back of your modem.
Step 10 of 10
You’re all set to go.
Need help? Call us at 310-BELL

Fibre jack
Can be located anywhere throughout your home and may feature a Bell logo.

Optical Network Terminal
Typically located in the basement, near the electrical panel, or in a closet for apartments/condos.

Green cable
Typically located in the basement, near the electrical panel, or in a closet for apartments/condos.
Welcome to Self-install! You are moments away from enjoying your new Fibe service.
Your Self-install kit includes:
- Modem with pre-connected white cable
- Power supply
- Wi-Fi pods if ordered
Make sure you read any manufacturer's installation and safety guidelines provided in the box before you begin. Be sure to install at recommended distance.